 It’s not ideal, but sometimes you have to plant in the middle of a heatwave. Fortunately, it can be done successfully, even here in the high, windy and dry zone. High temperatures, wind and strong sunlight cause water to evaporate from plant leaves faster than the roots can take up water.
The key to survival of new plantings is shade – for the plant and for the soil. Here are some tips:
 Plant on a day of respite from the sun, on what I call a ‘soft’ day – overcast, relatively calm, relatively cool, and maybe even sprinkling a little. Or plant in the evening so plants have time to make some adjustment to their new home overnight.
- Remove flowers, buds and spent flowers to redirect the plant’s energy to its roots.
- Dig your planting hole, then water the hole and wait for all the water to be absorbed before placing the new plant in the hole.
- Create shade by making a temporary support structure and covering it with shade cloth or similar fabric. Light colors are best. If you’re planting in a full-sun area, leave the shade cloth on for a couple of weeks.
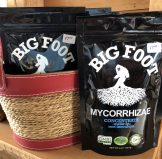
 When planting, apply a solution of soluble mycorrhizae to the plant roots and water the plant in with it as well. Something like 97% of land-plants on Earth rely on partnering with mycorrhizal fungi, which quickly get to work bringing water and nutrients to plants in exchange for sugars that the plants exude from their roots. In our experience, applying mycorrhizae makes a world of difference!
 Apply mulch around the plants, 2” deep or more. For vegetable gardens, use straw, hay, dry, seed-free, herbicide-free lawn clippings, shredded dry leaves. For landscapes, use the shredded dry leaves or our Fine Woodchip Mulch, or in a rock garden or xeriscape, use squeegee (fine gravel).
- Water deeply. At first, the new plants often need frequent (daily) watering as well. A sprinkler or watering can that delivers a gentle, relatively fine mist is best (unless you have a drip system set up).
For experienced gardeners only: Bare-root your plants before planting. Our potting mixes are designed to make the transition from pot to garden as seamless as possible. But especially when planting specimens not grown in Harlequin’s Gardens’ potting soil, you may choose to try ‘bare-rooting’ your plant just prior to planting. If you’ve never tried this before, we recommend allowing the soil in the pot to dry out about half-way, then gently removing the pot. Working over a potting tray or tarp, gently shake or tap the root mass to dislodge whatever potting soil will readily come away from the roots. Do not try to pull the soil off the roots – this will tear them. If there is a mass of encircling roots at the bottom, you can carefully tease them apart.

plant removed from pot

plant with soil partially removed
You should end up with a root mass that is longer than the depth of the pot it grew in. Apply a solution of mycorrhizal inoculant to the root mass, and plant in a hole deep enough to accommodate the elongated roots. Backfill gradually with appropriately amended garden soil, gently pressing the backfill soil against the roots to prevent air pockets. Water the plant thoroughly, using a watering wand or can that deliver a gentle spray. Here is a link to a video from a Denver Botanic Garden staffer (the video gives you a basic idea, but falls short of really explaining why it works). Bare-rooted plants can make the transition from living in potting soil to living in real soil without much trauma. The video doesn’t mention that when you wash off the potting soil, you will usually find that the root mass relaxes and is much longer that it was in the pot. This means you can dig a deeper planting hole and the roots will be much more sheltered from the heat and evaporation. Do use mycorrhizae when you plant bare-root!
 Happy planting! And don’t forget that YOU need to drink lots of water, too!
