 Okay, you prepared your soil and planted your vegetable garden with all kinds of wonderfully flavorful, nutritious foods, you’re watering and watching them grow, and wondering ….. When can I start to eat them, how do I harvest them, and how do I get the most out of these plantings? Here are some tips on vegetable crops harvest timing and techniques that may not be self-evident. Even if you’re a seasoned gardener, you may not be aware of some of these procedures!
BASIL (Genovese, Italiano Classico, Sweet, Italian Large-leaf, Cinnamon)
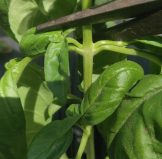 Lots of gardeners think they must wait until late summer before harvesting their basil for making classic Pesto Genovese, but it’s not true. If you wait that long, the leaves will be tough, and the plant will not have achieved its potential volume.
Once your basil plant has established a strong base, you should be able to make cuttings every couple of weeks. Cut stems back to a place just above where two side-branches will form from the growth nodes located in the leaf axils on opposite sides of the stem. This produces a bushy plant with a lot more stems and leaves. Your first cuttings may be only a few inches long, but subsequent cuttings will be longer, fuller, and more numerous. If there are enough of them, use the cuttings to make a small batch of pesto. As the season progresses you will make larger and larger batches of pesto and have plenty of leaves for Caprese and other salads, stir-fries and even ice-cream. Trim your basil flowers and bud-stalks: the leaves don’t taste as sweet once the plant flowers and puts its energy into making seeds.
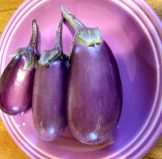 EGGPLANTS should be picked while they are still firm and glossy. Once their skins have become dull, they will be softer and have dark seeds, which can spoil the flavor. Eggplants don’t keep long, so use them soon after harvest. This year, eggplants should start being ready for harvest in late July and early August.
BELL PEPPERS and SWEET FRYING PEPPERS are sweetest when allowed to ripen fully to their mature color, yellow, orange, red, purple or mahogany. Bell peppers are often picked green, but their flavor will be a lot more pungent and they may be more challenging to digest. Harvest regularly to keep the plants producing more flowers (future fruits)!
Some of the HOT PEPPERS are traditionally enjoyed green – poblano, mulatto, jalapeno, Anaheim-type, while most of the rest are allowed to ripen to red (cherry, habanero, cayenne, lanterna, any chile dried for a ristra, etc.) orange (Bulgarian Carrot), or dark brown (Pasilla).
Many ‘BLACK’ or ‘PURPLE’ TOMATOES have green ‘shoulders’ and should be picked when the fruit is plump and firm, and the bottom ½ to 2/3 of the fruit attains its rich mature color and the shoulders are still green. There are a few varieties I have found attain their most perfect flavor when plucked from the vine a day or two before eating, and allowed to ripen further on the kitchen counter (most notably ‘Purple Calabash’).
TOMATO – Green varieties like ‘Green Doctors’, ‘Aunt Ruby’s German Green’ and ‘Green Zebra’ are ripe when you can detect a gentle blush of yellow infusing the green. Tomatoes should not be refrigerated, as it ruins their texture. Black from Tula, Paul Robeson, Black Krim, and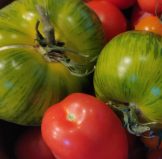
other purple (sometimes called ‘chocolate’) varieties will have dark green shoulders on a deep rose fruit.
TOMATILLOS are ready to harvest when the fruit completely fills its papery husk and the berry is revealed. The color may still be green, or it may have begun to turn yellowish.
SUMMER SQUASH are quite varied (zucchini, crookneck, scallop, tromboncino, Lebanese, etc.), but most are best for sauté, steaming or salad when quite small. In Italy we found that zucchini was always sold when only 4” long and with the big orange blossom still attached. But of course there are good uses for the ones that got away, too. Check your plants daily as production stops while fruit is growing larger on the vine.
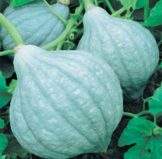 WINTER SQUASH should generally be left on the vine or bush as long as possible for the flavors and sugars to develop, but should be harvested when its skin resists puncture by a fingernail and before the first hard frost. Many varieties of winter squash can be stored for months in the house and attain their best flavor after such ‘curing’ (kabocha-types, butternut, hubbard, and more). Be sure to leave at least 1″ of stem on the squash so it can cure properly.
PUMPKINS can be harvested after their rinds are hard and skins have turned their ultimate orange, scarlet or white, depending on the variety. Be sure to leave 3 to 4” of stem attached so they will store well.
MELONS are tricky, as there are so many types. Whenever possible, we have included tips in our descriptions of individual varieties on our website. Most canteloupes will ‘slip’ easily from the stem when ripe. For other types of melons, check the leaf closest to the fruit, and when it begins to yellow, the fruit is probably ripe. Some melon varieties give fruit color or texture clues. WATERMELONS are usually deemed ripe when the tendril closest to the fruit is dry and brown, or when the bottom side of the fruit is yellow.
CUCUMBERS vary enormously, so you may have to research the varieties you are growing. Generally speaking, cukes for pickling need to be small and very firm, and slicing cucumbers should be picked relatively small (up to ~8″ long) to minimize their seed development and keep skins from becoming thick. Cucumber plants are most productive when kept picked. Oversized cukes can be fed to the chickens.
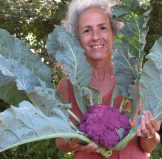 CAULIFLOWER should be harvested while the head of ‘curds’ is firm, the florets are tightly bunched and you cannot see any space between them, and the surface has not browned. This is true for white, orange, green and purple-headed varieties, except for the new varieties like ‘Fioretto’ that are meant to grow curds on separated stems. And don’t discard the cauliflower foliage – it is sweet and tasty, too, and can be shredded for salads like coleslaw or steamed and buttered. Cauliflower plants are ‘heavy feeders’, requiring high fertility at all stages of development in order to produce good-sized heads. We recommend side-dressing with (scratching in) a second application of an organic fertilizer like Alpha-1 or Harlequin’s Fertility Mix in the fifth week after transplanting.
CELERY ROOT (Celeriac) is usually best picked at about 3” diameter. It keeps in the vegetable drawer of the refrigerator for months. You can freeze puree of celeriac for future use in a potato soup or as a side dish.
Most GREEN BEANS require daily inspection to catch them at their peak, when they are nearly full size, firm and crisp, and seeds are still small. Romano beans are more forgiving, and the long flat pods are still delicious and tender even when they are fairly large. But don’t allow any beans to develop to full maturity, as this will signal the plant to stop producing more pods. To prevent the possible spread of diseases, don’t harvest or handle bean plants when the vines are wet. You should expect a full three weeks of maximum production on bush beans.
If you sowed RUTABAGA in July, it should be harvested in October-November, when it will be tasty and tender. Small roots are the tastiest and sweetest. They keep for a long time at 33 degrees F. (in the refrigerator bin).
KOHLRABI from spring sowings should be harvested when small – less than 2”. Sowings made between July 10 and August 10 are less likely to become woody, and can remain in the ground well into fall, as they are hardy to about 10 degrees F. They can be allowed to reach 4-5” diameter.
SWISS CHARD
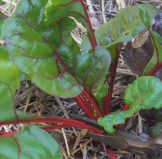 If properly harvested, Swiss Chard provides some of the greatest bounty in the Colorado garden. Closely related to Spinach, it offers similar nutrition and flavor in leaves many times larger than spinach, and can be harvested over a bounteous long season, long after spinach has bolted in the heat. Chard can be substituted in most spinach recipes, and can produce well into autumn, and even overwinter with a little protection. To maximize your chard output, the trick is to harvest by cutting off the full-grown leaves from the outside of the plants, making sure that at least 3 leaves remain in the center of each plant. This way, you should be able to cut again in a week or two. A little shot of compost tea and/or an organic liquid fertilizer (Age Old ‘Grow’ or Neptune’s Harvest Fish & Seaweed) applied after a cutting will boost re-growth. This can be repeated throughout the growing season!
COLLARDS
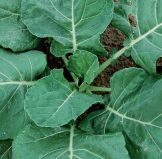
Leaves can be harvested individually, from the bottom up before they reach 12” long (while still tender) or whole plants can be harvested. In the Southeast, they are mostly grown for harvesting in fall and winter and are traditionally cooked long and slow with seasonings and cuts of pork or ham. As with Kale, Collard leaves become sweeter after they’ve experienced a light frost.
But Collard greens can also be grown in succession for a constant supply of young, tender salad greens during the hot months when arugula, spinach and lettuce are finished. Fresh, tender leaves can also be used finely chopped (after ribs have been removed), and briefly sauteed in extra virgin olive oil with minced garlic, salt, and pepper. Collards can also be fermented to make Collard Kraut.
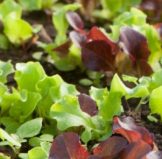
Photo credit: Johnny’s Seeds
LETTUCE
There are a couple of different ways to grow lettuce. You can sow seeds or transplant starts about 8 to 12” apart, depending on the variety, and harvest full heads when they are ready. To avoid harvesting all your lettuce at one time and having to eat lettuce for breakfast, lunch, and dinner for a week, make very small successive sowings every week or two beginning early in the season and ending with the most bolt-resistant varieties in mid-May. You can take the same approach with later plantings for fall harvests.
Another approach, which yields baby lettuce continuously for several months, is to sow the seeds very thickly (~ 8-12 seeds per square inch) by scattering seed straight from the packet in a wide bed (not a single row) early in the spring or in August for a fall crop. When the plants are about 3 to 4” tall and make a solid mass of foliage, cut a section of the mass down to about 1.5”, leaving one or two sets of leaves on each stem so that the plants can re-leaf. A little shot of compost tea and/or an organic liquid fertilizer (Age Old ‘Grow’ or Neptune’s Harvest Fish & Seaweed) applied after a cutting will boost re-growth. Cut your next salad from an adjacent section of the planting and continue until you’re back to the first cutting area, which will have grown back in the meantime and can be cut again!
You can easily have a colorful mixed salad with every cutting by sowing a pre-mixed seed like Botanical Interests Farmer’s Market Blend or Gourmet Baby Greens or make your own mix of leaf-lettuces.
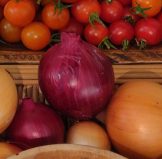 BULBING ONIONS are cured in the field before being harvested (unless you are going to use them immediately). When the tops begin to dry out and are falling over, withhold water, if possible, so the bulbs can mature in dry soil. After about half of the tops have fallen, push over the remainder, wait about a week and harvest the bulbs. Cure them for about a week to toughen the skins. This allows them to last much longer in storage. To cure them, spread the bulbs out on the ground in the sun, covering them at night with a tarp to prevent dew from wetting them. If the weather at this time is cloudy and wet, cure them on the floor of the garage, barn, shed or house. They are ready for storage when the necks are completely dry and shriveled.
LEEKS are ready whenever they have reached ½” diameter or larger. Winter varieties like Bleu de Solaize are very cold-tolerant and can be left in the ground and packed in straw to prevent the ground freezing around them so you can pull them out as needed through the winter.
PARSNIPS taste best when left in the ground through a couple of frosts. Begin harvesting in October, and mulch heavily with straw or hay to keep the ground from freezing. You can continue harvesting as needed through the winter.
